

A New Kitchen and a New Baby
- Jessica Doberneck

- Oct 8, 2021
- 10 min read
Updated: Jun 3, 2022
My, my, my, where to begin! Well, our kitchen is 90% done and I haven't written much about it because, if you remember, we had a BABY about halfway through the project haha. Great timing!
Isn't she perfect, though?! I mean, how could I write when I have this darling baby to look at and hold???

If you've been keeping up with our Instagram/Facebook stories, you are probably in the loop on some of the main events! But let me give you the FULL rundown of everything we did (links included!) and what we have left to do. You can expect a cost breakdown and some How-To's coming your way once it's officially done.
The first step in a full kitchen remodel is to arrange the big-ticket items! The better you are at this the quicker your renovation will be.
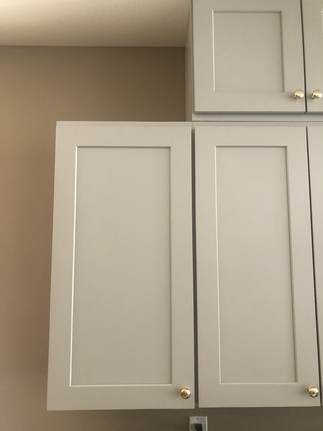
We ordered cabinets from RTA in Weston Sandshaker. I loved this color because it looks like a soft taupe with a hint of grey. Just enough color to warm up the space without being too bold.
I posted on a community Facebook page asking for contractor recommendations to demo and patch walls, as well as install cabinets. I, regretfully, committed to the cheapest guy out there. He was cheap, but I think it ended up costing us more money in the end. Needless to say, I had our contractor lined up ready to go and that should be step 2.
I ordered quartz countertops from The Yard and locked in a trustworthy fabricator, (someone who cuts and installs countertops), Betto's Custom Stone. The countertops were white with grey, taupe, and gold veins. The veins were thick and quite a classy statement!

However, a day before the fabricator cut our stone I changed my mind! I realized I hadn't chosen the backsplash yet and if I continued with the veined quartz, I would limit my color options for the backsplash. At the time, I was feeling a little Closter phobic with my decision and I also was beginning to feel like the bold veins were just a little too classy and mature for what I wanted the space to feel like. So, I went back to my original plan of solid white! It cost $100 to swap the old and new slabs back to The Yard, but the solid white slabs were $400 cheaper than the veined. So, I walked away from that last-minute change order saving $300 and leaving my backsplash options more open. I'll take it!
I began shopping for hardware and a faucet. I knew I wanted brass hardware to bring out the warmth of the cabinets and continue running with a warmer-toned space. This took ages! There are so many options out there and it's so hard to find a faucet that will match your hardware, and even then sometimes you'll find the perfect knobs for your cabinets but they don't come with matching pulls for your drawers! UGH! So annoying. For a minute there I honestly wanted to start my own hardware company of custom designs haha! That's how frustrated I was! HA! Needless to say, I ended up with a few options lined up at the ready. You want to at least have a faucet picked out and in-hand BEFORE your countertops are installed so the fabricator knows where to put the hole(s) for the faucet.
Now that all the key decisions are in place... it was Go-Time!
Or so we thought... The cabinets arrived and... well... let me actually stop there! I will have to save our cabinet fiasco for another post; I don't want to hijack this post and fill it with too much drama! Haha. But stay tuned because it's my best/worst experience yet! HA! I'm literally shaking my head thinking about how crazy that was!

TWO MONTHS LATER, after we finally ironed out our cabinet order situation (to be explained in a future post), I arranged for my contractor to begin demo the following week. This gave Tyson and me a weekend to empty our kitchen goods, uninstall our countertops and cabinets, and assemble our new cabinets.
Demo-ing a kitchen is actually very easy! You literally take a crowbar to your countertops and unscrew your cabinets. Simple as that!


Our contractor came to remove our giant obnoxious pillar, chunky "decorative" beams, and raised breakfast bar. This took 2 days.

We were going to remove this chunky beam going down our kitchen wall, but it turns out our water line to our sink and dishwasher are in there!

We learned that the hard way when our contractor cut into the beam and water started pouring out the other end of our ceiling beam! Luckily, it was all fixable and there was no water damage. But, in case you were wondering, water falling from your ceiling is a terrifying feeling even if it is a minor fix! Anyway, it would cost another $2,500 to move those pipes into the wall so we quickly yet reluctantly decided to leave it as is (NOTE: remember this part! It will come back to bite me later!).

Another issue we ran into was that our contractor somehow didn't include demo-ing our raised breakfast bar into the initial quote, so that tacked on some extra money we weren't expecting. Then on top of that, our dang water pipes just so happened to be IN that raised portion of the breakfast bar! SURPRISE! So we had to pay more to move them down a foot or so. It was not an option to leave our peninsula split level - NO WAY.
THEN! (To jump ahead a little) When our countertop fabricator came out to take measurements of the cabinets, he said our contractor did not do a good job in leveling out the wall with the cabinets (among other things) - and the countertop needs to be resting on a flush wall and cabinet action. Obviously.

Trimming this up was something we could totally do ourselves, but here's the thing: We paid the contractor to do the job, so there's no reason for us to do his job for him; that's just a waste of money and time. So, we kindly asked him to come back out and level it up. Keep in mind that when you use such powerful tools to saw down the wood and drywall, it will rattle your pipes in the wall - it's inevitable. I tell you this because the day after he came back out to level the wall flush with the base cabinets, we noticed water pooling on our floor by the breakfast bar!

Are you kidding me?! I was so mad because I thought this leaking water was from the previously cut and repaired water pipe! After cooling off, I sent our contractor a picture and asked if he could come back to take a look. Thankfully it wasn't coming from the patched pipe he had nicked. He cut open the drywall and saw that he didn't break anything (thankfully!), the seal had just come loose from being vibrated during the demo. Since this was inevitable and not a mistake on his end we would have to pay him more to fix it. We weren't sure how I felt about this stipulation - but we were just done dealing with this guy so Tyson ended up fixing this himself. Bless up for YouTube and husbands that are willing to get their hands dirty and learn a new skill!
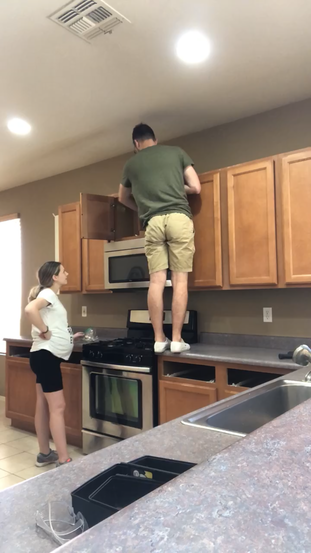
Now keep in mind this contractor also installed our cabinets. How did that go, you ask? Well, remember how we planned to remove the chunky pillar on the kitchen wall but couldn't because that's where our water pipes were so we left it as is? Well, when I was measuring and planning the cabinet layout, I didn't take the pillar into account since it wasn't going to be there. Instead, I planned them going off of where the microwave and oven were. So, after installing the upper cabinets flush with the pillar, our contractor realized our bottom drawers weren't lining up with our upper cabinets. He said I must have mismeasured and now we don't have the right sized base drawers to fill the space. He suggested I swap some base cabinets from the peninsula around (as seen below), but then I would lose my "all drawer symmetry" and I did NOT want to do that.

THANKFULLY, they left for a lunch break and that gave me and Tyson time to think about what to do. I was so puzzled! I'm not the best with numbers so I GUESS I could have made a mistake...? But I checked my work a million times over! I KNEW I didn't mismeasure! Tyson pointed out that the oven was moved to the right about 3 inches and made the observation that the microwave would now need to be moved over now too...
And that's when it clicked!
They mounted the uppers flush with the wall beam (which I didn't account for), so all those upper cabinets needed to be uninstalled and moved to the left 3 inches to get them back lined up with the bottoms. We would have to go buy and install a 3" spacer to go between the beam and the cabinets! BOOM! Problem solved! When they came back from lunch, I explained everything to the contractor. And let me tell you, he was NOT happy. He kept trying to suggest other solutions and saying that it didn't make sense. I probably had to explain myself 3 times for him to finally understand (or maybe accept it). This was SUPER uncomfortable for me as I'm not a confrontation person and I HATE asking people to go out of their way. But there was absolutely no way I was going to leave it like that! If I left it as is, my kitchen wouldn't measure up - literally. Pun intended! I was really proud of myself for standing my ground. I definitely pushed myself out of my comfort zone and grew from this experience.

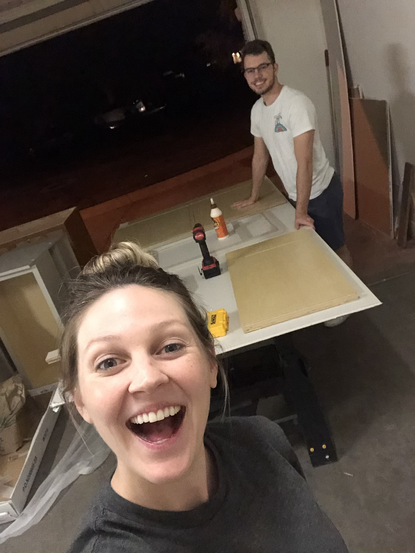
As you might notice in this photo above that there's a missing cabinet in the top left corner! That is because nobody makes a 16" by 16" cabinets. So we bought a 36" by 36" cabinet with the (hesitant) plans to cut it in half and jimmy-rig a makeshift cabinet. Tyson offered to do this so we didn't have to keep working with this contractor and spending more money (whew!).
Now on to the sink... I bought my farmhouse sink on Facebook marketplace months before we even started this project. It was such a good deal and exactly what I wanted; I couldn't pass it up. The thing with farmhouse sinks is that they are SO DANG heavy! We actually had to hire someone to install supports inside our sink cabinet as well as cut the cabinet to expose the front of the sink. This was a small cost we didn't account for but were very glad we hired it out.


Now that the sink area is prepped for install and cabinets are in, it's time for countertops! And as you know, I made a last-minute change order which delayed our install by another 2-3 weeks. In total, we were without countertops for 2 months. Luckily, Tyson took some extra drywall and cut holes for our faucet so we had a makeshift countertop AND functioning sink (with a wobbly faucet haha) for the last month! But, holy cow! I will say this to my grave, THE WORST part about renovating a kitchen is the lack of sink and water.
During the demo I finally decided on and ordered our hardware. Throughout this process, I kept coming back to a specific set of hardware (also used and recommended by Angela Rose - a wonderful, popular Home Renovation DIY-er) and a specific faucet.


They were both twice as much as I had wanted to spend and budgeted for, so I just kept looking for similar items at a lower cost. I actually ordered some low-priced brass hardware from Wayfair in hopes that it would win my heart aaaaaaand... it totally didn't! The pulls were just too small and the color was too yellow and cheap looking.


I could have made it work, but man, I just didn't love it! I also ordered a brass faucet that was super unique, but again, I didn't get the flutters one bit when looking at that thing! One day, I had three different confirmations on what I should do: 1) I realized I visited my Etsy shopping cart that held the hardware I liked so much that it was my first suggested website on my google home page for weeks 2) I realized I was calling this faucet "MY Faucet" 3) Tyson told me, "Don't you want to love your kitchen? This is your baby. Get whatever you want so that you're happy when you see it instead of feeling regretful." That last one really sealed the deal. He's totally right. So, I ordered them both that day! And guess what - my hardware and my faucet are my two FAVORITE things about my kitchen. In fact, I believe they totally rule the space! They own it. Best decision I made.


To make the space feel a little more finished, we spent the 2 days before the baby was born painting our entry to cover all the patchwork and match our Livingroom walls.


And for one final finishing touch to feel like life was almost back to normal: Our mirror was back up!

And just like that, our entire focus diverged as we welcomed our sweet Baby Jane on May 17th. What a JOY she has been! You think you're in love with a faucet and some hardware... just wait till you MAKE and PRODUCE a human! Talk about heart flutters and butterflies! Sheesh.


Aaaaaaaand a couple of days after we came home from the hospital, Betto's team installed our solid white quartz countertops! It was like a weight was lifted! What a difference. Who knew how great countertops would feel after spending a month with drywall "countertops"! Ha!

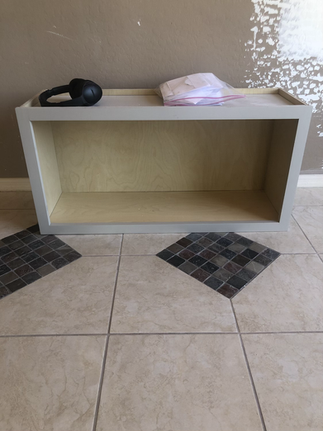
We took some time to be together as a family, rest (when we could), recover, and adjust. But we quickly realized time was flying by and we had a ton of family and friends coming in town the 4th of July weekend for Jane's Baby Blessing, Callie's early birthday party, and Independence Day festivities. That meant it was time to finish up a few musts's on our list: cover the back of the breakfast bar with shiplap, fill in our floor tile, and build and install that 16" by 16" cabinet. Backsplash was also on the radar, but I hadn't found anything I liked yet so that to-do was saved for later.
Tyson killed this to-do list in one week while I pretty much just "supervised" and watched "The Girls" (my new favorite thing to say).


And just in case you were wondering, we had a wonderful summer! Our 4th of July weekend was jam-packed with activities... Followed by a trip to Yellowstone with my side of the family... Followed by the annual Udy Family Reunion in Rockland, ID. with my dad's side of my family... And we ended the trip with a quick 24-hour visit to our old stomping grounds in Rexburg, ID. It was pretty busy, to say the least. We spent the rest of our summer and maternity/paternity leave at the pool, trying to sleep, and playing with friends.
Now that things have settled more, we are revisiting our to-do list that I am constantly adding new projects to! But first up on the list is FINALLY selecting and installing our backsplash! After that, it's clean up the shiplap and touch-up our quick paint job in the entry. So, stay tuned for the LAST and FINAL steps to FINISHING our kitchen remodel. Can't wait!


In the meantime, we'll continue enjoying our NEW kitchen and NEW baby!

Sincerely,


Wow. All I can say is Wow. And that is both an impressed/ happy and an overwhelmed/frustrated WOW!