How We Did a Total Kitchen Remodel Under $7,500
- Jessica Doberneck

- Aug 7, 2020
- 9 min read
Updated: Jun 3, 2022
I gave you the before, now let me give you the middle and after of our kitchen remodel! I'll break this down into 1) Budget and planning 2) Issues we ran into 3) Design choices 4) Break down of the actual costs.
1. Budget and Planning
The biggest factor in whether or not we could financially take on this project was the cost of new cabinets. After shopping around I quickly learned the cost of new cabinets can vary quite a bit! I'm talking 3k - 20k depending on the quality and customization! For our 10x10 kitchen, you can expect basic solid wood cabinets to cost at least 10k. But if you dig a little deeper you'll find another tier of options through major chain companies typically made out of particleboard or plywood. Larger chain companies are able to bulk manufacture these cabinets allowing the customers to measure, layout/design, shop, and install for themselves. This is the cheapest option out there while not sacrificing too much on quality. You can find this kind of cabinet at Home Depot, Ikea, and Lowes with very similar pricing (2.5k - 5k) and quality. We eventually decided to go with Lowes and here's why:
Ikea - In order to keep costs as low as possible we would have to assemble EACH and EVERY cabinet/drawer in addition to self-installing. BLEGH! That sounded dreadful! Time was a major factor in taking on this project. Tyson and I couldn't miss work/school and my dad could only come help for 1 week. We also read through hundreds of reviews on all 3 companies; Ikea seemed to come back with the lowest reviews and we began to question the quality. We also learned that Ikea was the most expensive of the 3 options - that alone ruled them out.
Home Depot - They offered plywood cabinets through a brand called Hampton Bay. Very similar to Lowes' option, just a hair more expensive. Home Depot does not keep these cabinets in stock so the ordering and delivery process could potentially delay our timeline. If anything went wrong with the order we would miss the ideal window of time my parents could make the trip out to help us.
Lowes - They had the cheapest option with particleboard (or furniture board) cabinets through a brand called Diamond. Lowes keeps all of these cabinets and drawers in stock at the store location. This was a huge factor as we could get our order delivered within a week and if anything went wrong we were a 40-minute drive from the nearest Lowes.
Lowes checked all of our boxes: lowest price and quickest timeline and quality! Seeing that our cabinets should be in the $2,500 range, we now needed to get a feel for the cost of countertops before we fully committed to this renovation! In the meantime, I send my dad all the dimensions and he began mapping out the kitchen and making a list of each cabinet and drawer size we would need. Here's his beautiful piece of work:
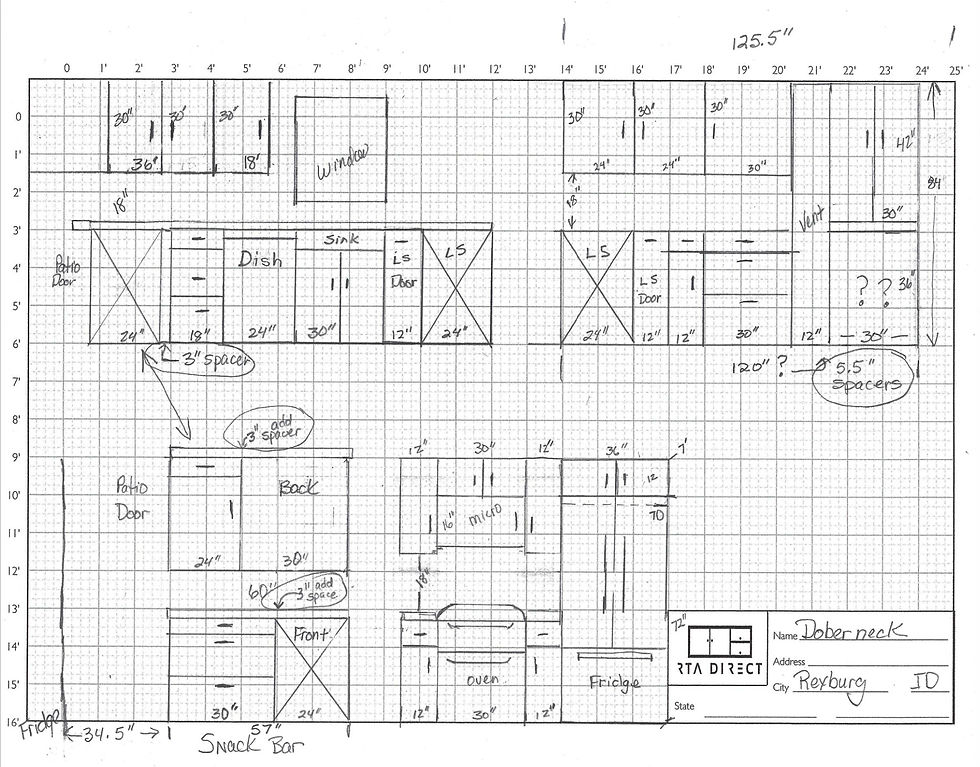
I mean really? Who's got a better Dad than me? No one!
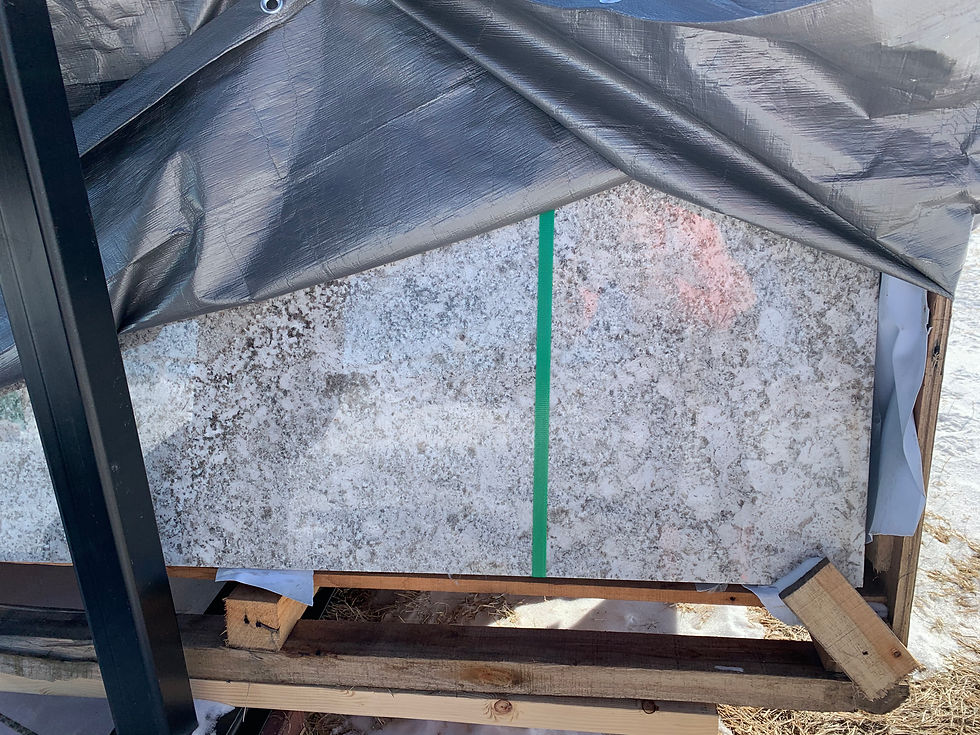
I was advised by a realtor friend of ours that granite countertops help you get the most bang for your buck in Idaho. This gem of info helped me quickly narrow down my shopping list! I found a granite guy through Facebook Marketplace that had very low prices. We went out to his property and picked out the slabs we liked. Lucky for us, it was the second to cheapest option at about $550/slab (not including installation)! I had gotten other quotes from more formal stores and it was almost double the price. Here's why: The granite from my Facebook guy was made and shipped from some 3rd world country where the workers are not professional and the quality is just not pristine. The slabs were smaller which would cause more seams (one in each corner), the granite was thinner, and we would need to seal it ourselves. Here are the 2 questions you have to ask yourself in trying to achieve a profitable renovation: Is the quality so bad it's going to break on me or the next owner? Can the naked eye see a difference in quality? If your answers are no and no, then you're fine!
Seeing that we found an affordable option for countertops and cabinets, we did a quick guestimate for the entire project to ensure this was something we could afford. Here's the breakdown:
$2,500 Cabinets
$1,200 Granite countertops
$1,200 Counter installation
$600 Lightfixtures (3)
$200 Microwave
$250 Sink
$400 Hardware
$200 Faucet
$150 Backsplash
TOTAL BUDGET: $6,700
We rounded up to $7,500 to account for emergencies and tools/materials. This budget was totally doable! Time to rock and roll!
2. Issues
There was only one red flag that concerned us with Lowes Diamond cabinets collection; we frequently found in the reviews that it wasn't uncommon for your order to be incorrect and reviewers advised to make sure you double-check your order before placing it. I only wish in the hustle and bustle of it all that I had actually followed that advice and double-checked my order. See, you can place your order online or with an in-person store representative. The person that helped us was very quick and just zipped right through my list so I assumed she got it all down correctly. Well, when the cabinets were delivered we had at least 8 pieces that were wrong. I would take the wrong pieces with me to work, return them and pick up the correct pice on my lunch break, and bring them home after work. Unfortunately, 2 different times the correct replacement was actually incorrect! Again! I think the issue lied in miscommunication. If I had been less trusting and more assertive and the employee was more thorough I don't think this would have been as big of an issue as it was. Even though this was a major annoyance - I would go with Lowes again in a heartbeat. They were very accommodating, helpful, available, and the cabinets worked out great! I loved them! {With that, I'd be curious to try Ikea and Home Depot as they were close runner ups!}
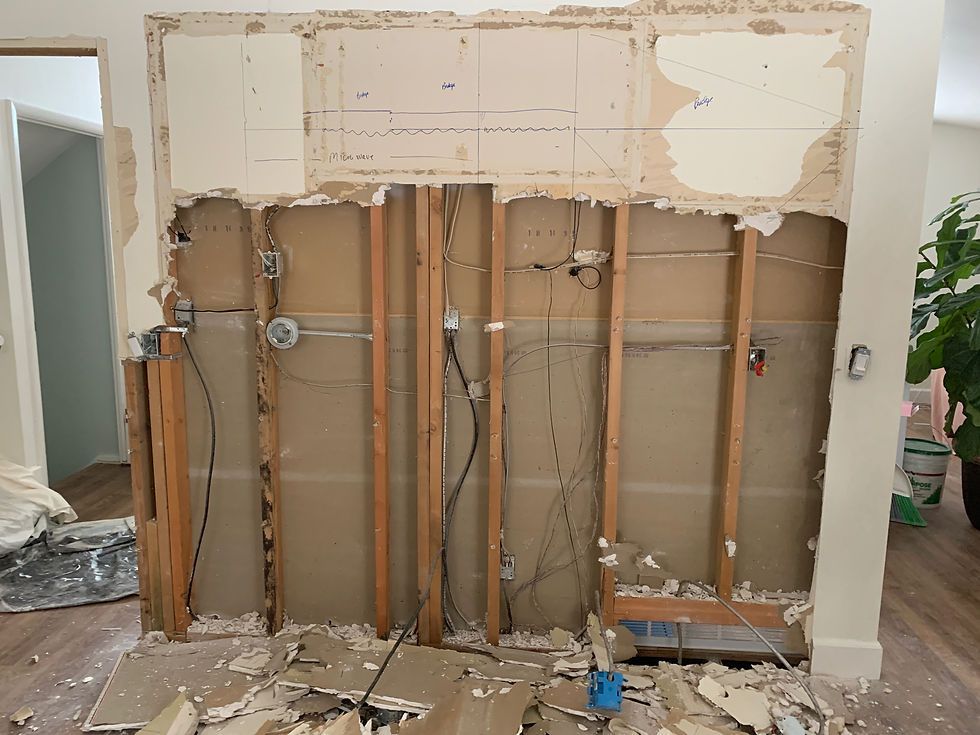
The only unexpected issue and extra cost we ran into was electrical. This was not the biggest shocker to us as it seemed we ran into electrical issues with every home renovation we took on! Our house was build in the '60s and it seemed the electrical work was jimmy-rigged ever since. {Did I mention one of our ovens was HARDWIRED into the wall??? LOL!} Side note, if you are in Rexburg or any nearing areas you will WANT, I repeat WANT, to go with GL Electric! He is the sweetest, most honest, and genuine man you will ever meet! He's got a great team, the highest quality electrical work, and is reasonably priced. Electrical work is never something we DIY (nor should anyone, if you ask me), and we used GL Electric for the 2 years we were in that home with absolutely no regrets. Anyway, stepping off my soapbox... the initial electrical issue we ran into was that we needed an outlet for our above-range microwave. As they attempted to add the electrical box, they realized how jacked up the wiring was and told us we needed to tear down the drywall to expose all the wiring so they could redo everything. We also got new outlets and upon installing them ourselves, we again realized there were many extra wires daisy-chained together - GL Electric came out again to fix and install our outlets. And lastly, Tyson tried to install our light fixtures, praying SOME wiring would be normal but alas, we overestimated our home... GL Electric came back a 3rd and final time to install our 3 light fixtures.
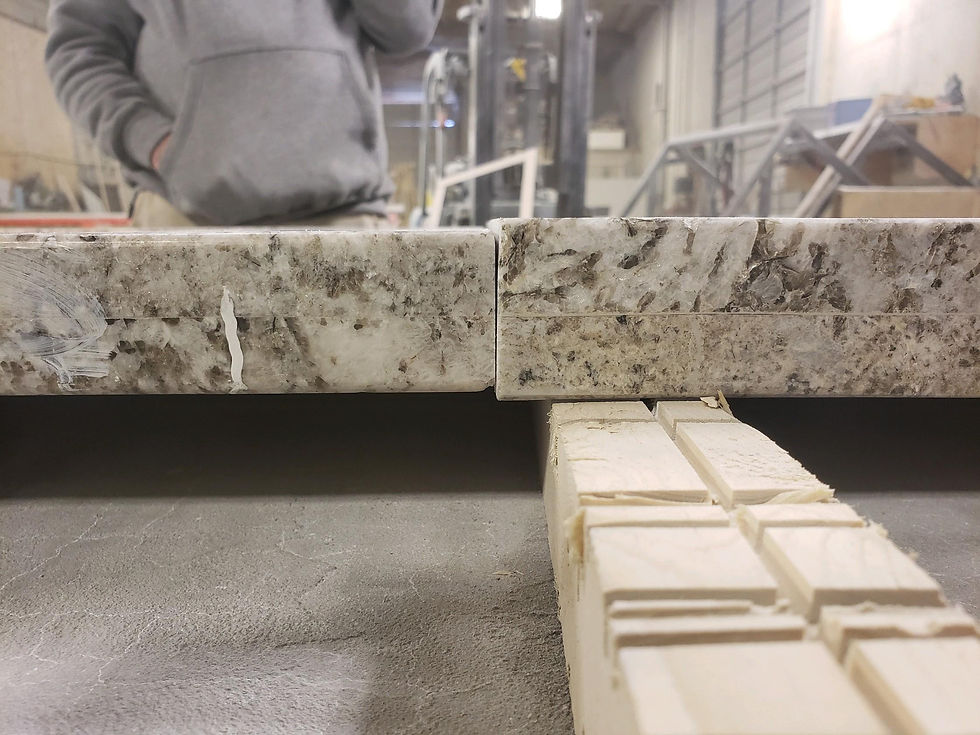
Countertops... This was probably our most time-consuming hiccup. Since the Facebook granite guy only sold the slabs he referred us to another company to install (which was an incredible company!). Since I wasn't already on their radar, they were booked out a few weeks. Then while they were cutting the granite, they learned the slabs were different thicknesses and needed to go back for a different slab and begin the cutting again. At one point one of the slabs actually broke and they had to go back for another slab (which was no extra cost to us, but unfortunately, they had to buy it from our Facebook granite guy). Granite breaking in the cutting process isn't necessarily uncommon, but considering our granite was thinner our odds were probably against us. Lastly, since we changed the layout of the kitchen to add more counter space, we needed to purchase a 3rd slab which cost us another $550 we didn't account for, but it was money well spent! Extra counter space is always a plus! After all was said and done, we went a full month without a kitchen sink and counters.
3. Design
Ahhhh, my favorite part!! This was a fairly easy kitchen to design as sellability limited the imagination and the budget influenced my final purchases. We needed to keep the design trendy yet neutral since the kitchen needed to appeal to as many buyers as possible. That being said the default cabinet style should definitely be shaker with flat drawers (as that would lower the price and maintain the style). As for the color, we should really only do white or grey, or black. However, the kitchen doesn't get much natural light so black was ruled out pretty quickly. And considering we already had a grey/blue wall in the living room we figured it'd be safe to stick with white cabinets.
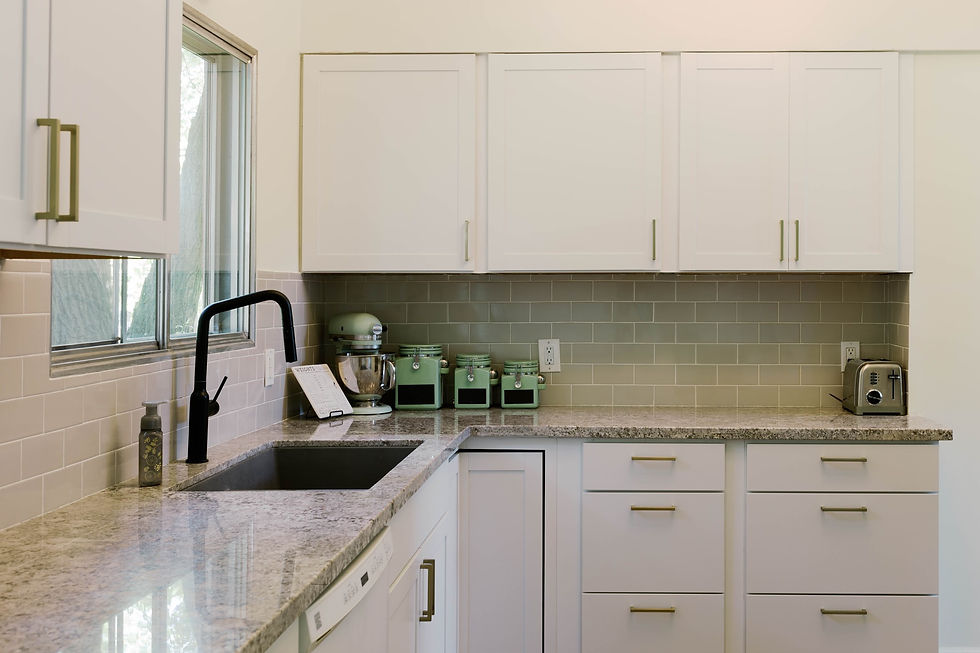

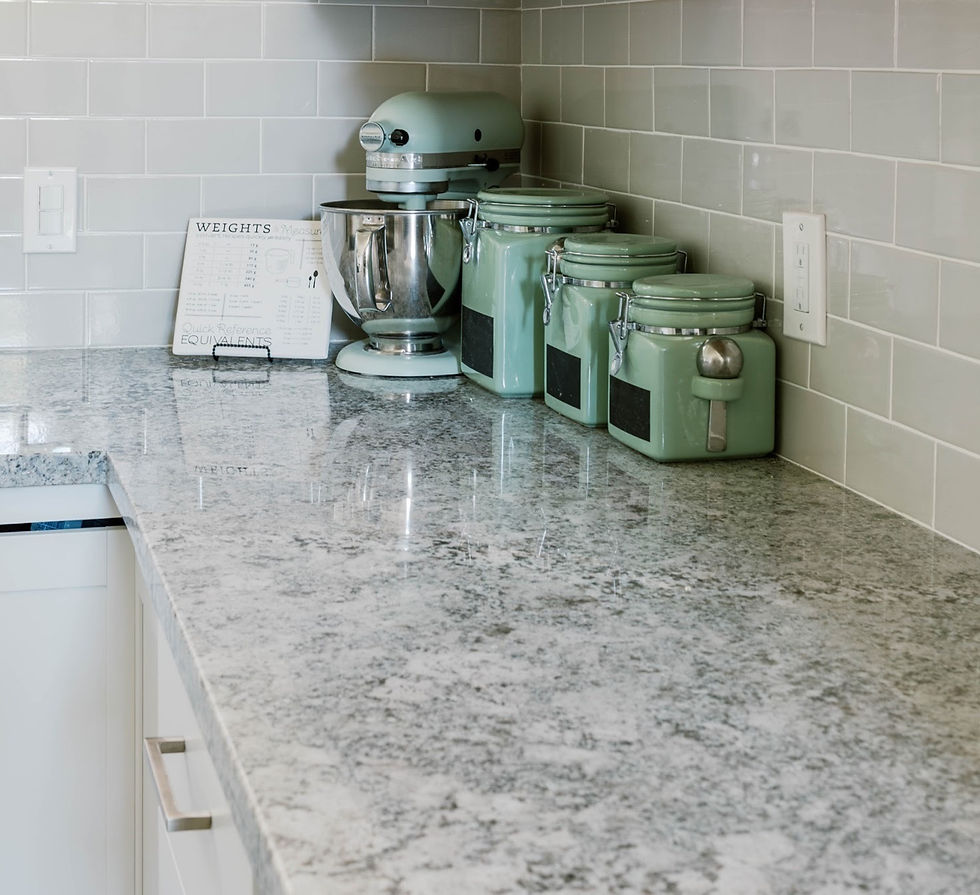
As for the countertops - that was easy. We quickly decided on granite, chose a supplier, and happen to fall in love with his 2nd to the cheapest option! I loved that it had black, grey, taupe, white, and flecks of gold! Which were all of the colors I considered for the space and these countertops gave me the freedom to go any directions with hardware, light fixtures, and backsplash without limiting me in any way moving forward.
We had a few options for backsplash colors and style but it essentially came down to price and design simplicity. Subway tiles are in style and very affordable! As for the color - white backsplash, cabinets, and walls were just too much white, but we didn't want to go too dark or too bold or too cool-toned! So, I dug deep and found a beautiful taupey grey and I LOVE it! Another thing to note is the grout color that you choose! This is very important (I could write a whole blog on this too...) but to keep things short - white is safe, clean, and keeps the space light and airy which was our end goal. PS. don't worry about white grout staining... just clean up after cooking and you'll be fine!
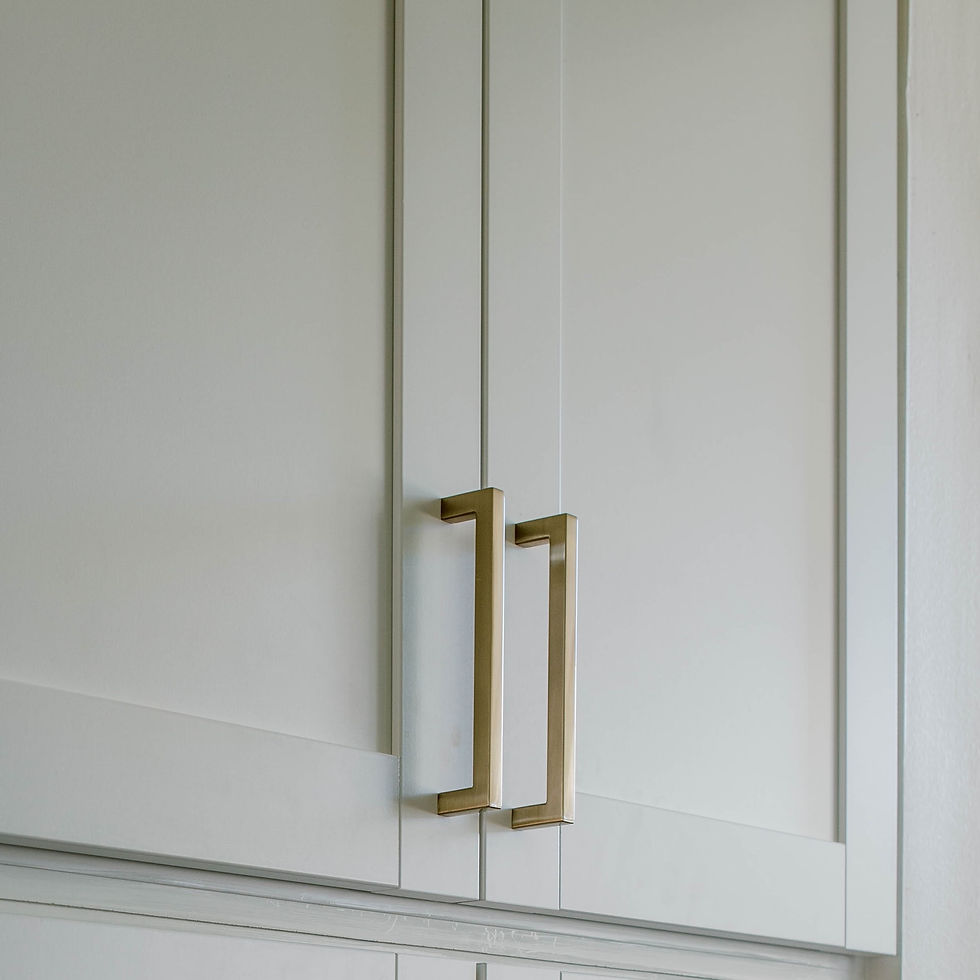
Hardware - This was also an easy decision as we really needed to warm up the space and gold is the only way to do that following our white cabinets and colder toned countertops. The tricky part with gold is that it can't be too yellow/brassy! I originally ordered a set of hardware that was really pretty but ended up being too brassy and totally clashed with the countertops. I needed a cooler gold. I searched and searched on Wayfair and finally found another set that was of equal value and the reviews specifically expressed that they were a cooler toned gold - exactly what I was looking for!
The one on the far left was my first order - too warm/rich/yellow/brassy gold (it was much brassier in person - I swear!). The middle one was a Home Depot option that was cooler than I wanted and very pricy. And the one on the far right was juuuuuuust right!


Faucet - This is where things get fun with mixed metals! I originally ordered a gold faucet to match the original gold hardware. Not only was the hardware too brassy, but the faucet was EXTRA brassy (it was borderline obnoxious)! I felt bad that we had gone a month without a kitchen sink and had to ask Tyson to uninstall the faucet, but it was just NOT going to work! We didn't come this far for it to look bad now! No way! Realizing golds were very hard to match let alone finding a cooler toned gold, I started to experiment with black. Which lead me to a beautiful black and gold light fixture above the sink to tie in the faucet and mix things up a little! Throwing in some mixed metals was initially intimidating but the most rewarding part of the project in the end!

Here's the inspiration board I had to send to my cousin, Larissa Udy, who is the REAL pro in the family! Larissa is a professional interior designer and my soundboard when I get stuck in a rut or am feeling like I need a push to try something new and bold!
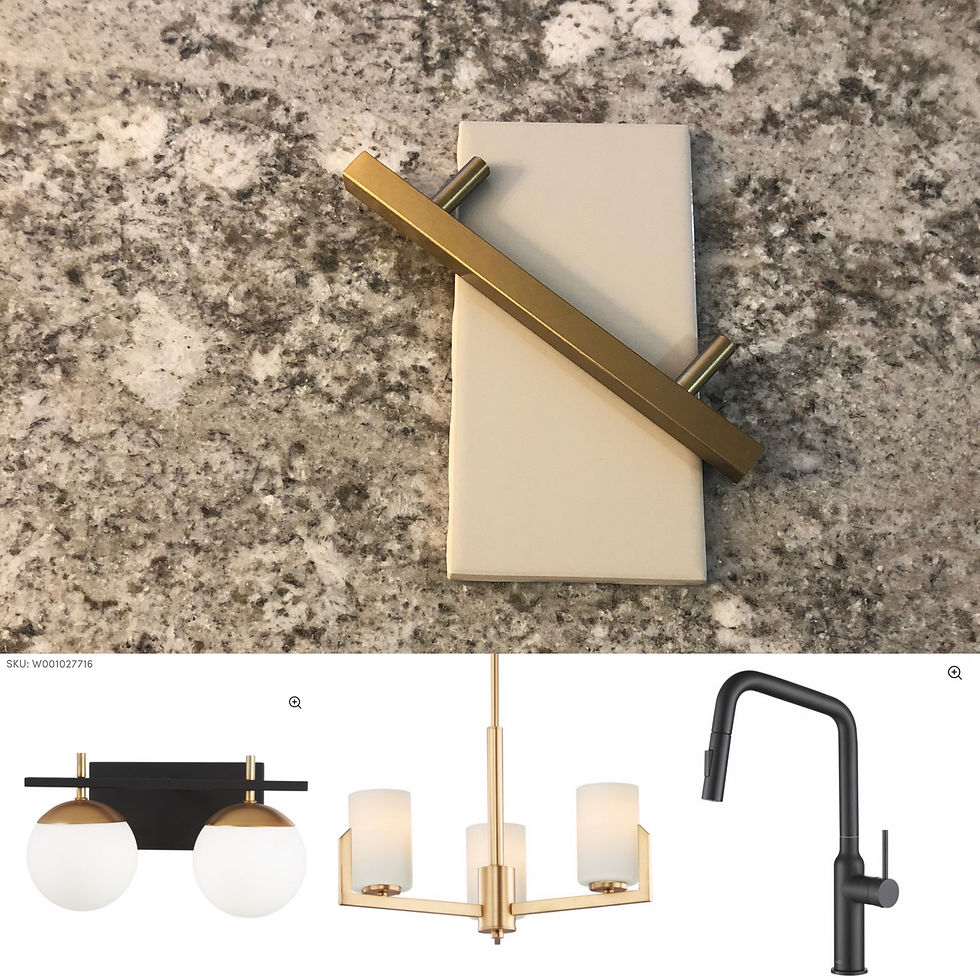
This leads me to my STUNNING light fixtures!!! I love these babies! I knew I wanted gold to tie in the hardware, warm up the space, and match the other gold accents in the living room. I also have this weird thing where I really don't like to see the raw lightbulb - it kind of hurts my eyes ha! In addition to gold and frosted glass, I knew it needed to be mid-century modern to tie in the integrity of the home and other design elements we had sprinkled throughout the house.


{See this beautiful table?? Yeah, Tyson made it! I'll blog about that gem another time!}
4. Actual Cost Breakdown
$2,450 Cabinets
$1,650 Granite countertops
$1,300 Counter + sink installation
$219.99 Dining room 5-light chandelier
$169.99 Kitchen 3-light chandelier
$165.95 Vanity style light above sink
$204.72 Microwave
$258.99 Sink
$186.39 Hardware handles and knobs
$184.69 Matt black faucet
$115 Backsplash
$202.46 Electrical work
TOTAL: $7,108
Now, this doesn't include the grout, drywall, random tools, quarter rounds, a gallon of paint, outlets, and all the randoms you just don't think about (let alone document so you can blog about it later - oops). That being said, it's absolutely safe to say the project was under $7,500! WE DID IT!
Here's my advice if you're going to tackle a profitable or low-budget kitchen renovation:
DIY as much as possible, but leave the plumbing and electrical to the professionals (unless you are one, then, in that case, lucky you!). Keep your design trendy but sellable and make sure it's fluid with the rest of the home's design. Find the cheapest option (ie. Lowes cabinets, FB granite guy, subway tile) and then find the cheapest option that matches your design and go with that! Expect issues, hiccups, and bottlenecks because they will happen. Last but not least, thoroughly budget and ROUND UP!
Sincerely,


Very thorough and informativs. Are you busy planning remodle orojects in your new house?
Wow! Your literary gift makes me feel as if was there for all of that!!! 😉